1 Once you have logged in, go to the EC2 service to start it up. Either use the top search bar to look for “EC2” or browse the “Compute” section to find it.
2 Start a new instance: To begin building a new EC2 instance, click the “Launch Instance” button.
3 You will be asked to select an Amazon Machine Image (AMI) during the instance launch wizard. To find the Windows Server AMI of your choosing, select the “AWS Marketplace” tab and conduct a search. There are several versions offered, including Windows Server 2019, 2016, and others. By clicking the “Select” button, you can choose the AMI that best meets your needs.

( 1 ) Instance = highsky-windows-server1
( 2 ) Application and OS Images (Amazon Machine Image) = Windows. Microsoft
4. Select a type of instance: Depending on the resources and performance you require, choose the instance type. You have the option of selecting a general-purpose instance or a particular instance type. After making your choice, pick “Next: Configure Instance Details” from the menu.
5. Configure instance details: Various settings, including the number of instances, network configurations, storage, security groups, and more, can be made in this area. When you have finished, click the “Next: Add Storage” option. Adjust the settings as necessary.
6. Add storage by setting up your instance’s storage options. If necessary, you can change the default storage size or add more volumes. After making your modifications, select “Next: Add Tags” from the menu.
7. You can optionally add tags to your instance to improve management and organisation. Key-value pairs called tags are a way of identifying and classifying resources. When you’re ready, press the “Next: Configure Security Group” button.
8. Setting up a security group will allow you to manage the inbound and outgoing traffic to your instance. A new security group can be made, or you can choose an existing one. For your Windows Server instance, make sure to enable inbound traffic that is required, such as Remote Desktop Protocol (RDP) for remote access. When you’re done, press the “Review and Launch” button.
9. Review everything you’ve configured for your instance before launching it. Click the “Launch” button if everything appears to be in order.

10. Choose or create a key pair: If you don’t already have a key pair, you’ll be asked to do so. For safe login to your instance, key pairs are utilised. Save the private key file (.pem) that you downloaded in a secure location. After downloading the key pair, select “Launch Instances” from the menu.
11. Launch status: A notification confirming that your instances are launching will appear. To access the EC2 dashboard, click the “View Instances” option.
12. Connect to your instance by choosing it from the list and clicking the “Connect” button after it has started operating. To connect to your Windows Server instance using Remote Desktop Protocol (RDP), adhere to the recommended steps.
I’m done now! AWS has acknowledged your successful creation of a Windows Server EC2 instance. Now you can use it for the settings and applications you like.
Connect to your Windows instance using RDP
1. When utilising Remote Desktop to login to your Windows instance, you must first locate the initial administrator password and then input it. After the instance launches, it takes some time before this password becomes accessible.
2. The name of the administrator account is determined by the operating system’s language. For instance, the correct term is Administrator for English, Administrator for French, and Administrator for Portuguese. See the Microsoft TechNet Wiki for more details.
3. You can access your instance using the domain credentials you’ve specified in AWS Directory Service if you’ve joined your instance to a domain. Use the administrator’s fully qualified user name on the Remote Desktop login screen in place of the local computer’s name and the generated password.

4. When the instance was launched, you created a private key (.pem) file; select Browse and go to that location. To copy the whole contents of the file to this window, choose the file and then select Open.
5. Decrypt Password is your option. In place of the previous Get password link, the console now shows the instance’s default administrator password under Password. Keep the password in a secure location. In order to connect to the instance, you must enter this password.

6. Select Download file from remote desktop. You are given the option to open or save the RDP shortcut file using your browser. To get back to the Instances page when you have completed downloading the file, select Cancel.
( 1 ) You would see the Remote Desktop Connection dialogue box if you opened the RDP file.
( 2 ) If you saved the RDP file, open it by going to your downloads directory and clicking it to bring up a dialogue box.
7. You can be informed that the remote connection’s publisher is unknown. To maintain your connection to your instance, select Connect.

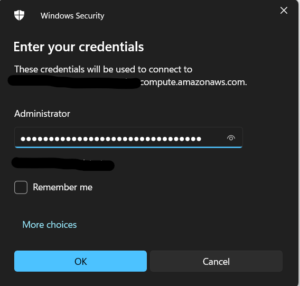
8. The default selection is the administrator account. The saved password should be copied and pasted.

9. You might see a warning that the security certificate could not be validated because of the nature of self-signed certificates. Use the next several steps to confirm the remote computer’s identification, or just select Yes (Windows) or Continue (Mac OS X) if you believe the certificate.


