28 September 2023

Kubernetes Cluster Installation on RHEL 9

Kubernetes is an open-source container orchestration platform created to automate the deployment, scaling, administration, and orchestration of containerized applications. It is frequently shortened as K8s (K-8 characters between “K” and “s”). The Cloud Native Computing Foundation (CNCF) now maintains it after Google initially built it. Kubernetes is an effective platform for scalable, high-performance management of containerized applications. Here are some essential Kubernetes ideas and elements:

1 Container Orchestration: A platform for automating the deployment and maintenance of containerized applications is offered by Kubernetes. Containers are application-running environments that are compact, portable, and reliable. Based on resource usage and application needs, Kubernetes aids in ensuring that containers are deployed and scaled appropriately.

2 Kubectl: The command-line tool used to communicate with a Kubernetes cluster is called Kubectl. It enables users to build, examine, and control clusters and resources for Kubernetes.

3 Cluster Management: With a master node and numerous worker nodes, Kubernetes functions as a cluster. The cluster is managed and controlled by the master node, and containerized applications are run on the worker nodes. Due to its distributed architecture, high availability, and fault tolerance are guaranteed.

4 Containers: Applications are packaged and operated by Kubernetes in isolated, repeatable environments using container runtimes like Docker. Containers offer consistency between many settings, from production to development.

5 Pods: The Kubernetes term for the smallest deployable unit is “pod.” One or more containers in the same network and storage namespace can make up a pod. Co-located and co-scheduled on the same host, containers within a pod can easily communicate with one another.

6 Services: With Kubernetes, load balancing and the network are abstracted for applications utilizing services. Services give users a consistent virtual IP address and DNS name that may be used to direct traffic to a collection of pods. Because of this, apps can scale horizontally while preserving a constant network endpoint.

7 Replication Controllers and Replica Sets: These controllers guarantee that an agreed-upon number of pod replicas are active at all times. According to required replica counts, they are in charge of scaling up or down pods.

RHEL 9 had not yet been released as of my most recent knowledge update in September 2021, and depending on the version of RHEL you are running, the procedure for installing Kubernetes may differ. The most recent installation instructions are in the official RHEL 9 and Kubernetes documentation, which I strongly advise consulting. However, I can provide you with a rough breakdown of the procedures needed to install Kubernetes on RHEL:

Installing Kubernetes on RHEL Step By Step:

1 Docker (Container Runtime) installation:

What Is Docker? How To Install RHEL 9

Click on this link to install Dock:-

2 Disable the firewall and SELinux (optional):-
Since firewalls and SELinux might cause problems for Kubernetes, it’s frequently advised to turn them off. However, you need to set up SELinux and firewall rules for Kubernetes properly in a production environment. To momentarily turn off the firewall and SELinux:

( 1 ) Open the SELinux configuration file: /etc/selinux/config

[root@server ~]# vim /etc/selinux/config

( 2 ) Locate the following line:-

SELINUX=enforcing

( 3 ) Disabled should now be the value.

SELINUX=disabled

Close the file after saving your modifications.

( 4 ) SELinux is indefinitely disabled upon the subsequent reboot. Execute the following command to dynamically disable it prior to rebooting:

[root@server ~]# setenforce 0

3 Next Firewalld Disable and Stop 

[root@server ~]# systemctl stop firewalld.service
[root@server ~]# systemctl disable firewalld.service

3 Create a New Repository Kubernetes:- 

Installing Kubernetes components may be done using the official RHEL Kubernetes repository. Install Kubernetes after adding the repository:

tee /etc/yum.repos.d/kubernetes.repo <<EOF
[kubernetes]
name=Kubernetes
baseurl=https://packages.cloud.google.com/yum/repos/kubernetes-el7-\$basearch
enabled=1
gpgcheck=1
repo_gpgcheck=1
gpgkey=https://packages.cloud.google.com/yum/doc/yum-key.gpg
https://packages.cloud.google.com/yum/doc/rpm-package-key.gpg
EOF

4 The Kubernetes components are now ready for installation:-

[root@server ~]# yum install -y kubeadm kubelet kubectl

5 Start the Kubernetes services by enabling them:

[root@server ~]# systemctl start kubelet
[root@server ~]# systemctl enable kubelet


27 September 2023

How To Create Auto Scaling In [ AWS ]

It takes a few steps to set up auto-scaling in AWS, and it’s commonly used to dynamically change the number of Amazon EC2 instances in a group to match shifting workloads. Here is a step-by-step tutorial for setting up auto-scaling on AWS:

1 Logging into the AWS Console:
Using the login information for your AWS account, access the AWS Management Console.

How TO  CERATE (AMI)
How to take AMI of EC2 and launch new EC2 using AMI

2 Selecting or Building an Amazon Machine Image (AMI)
The configuration of the EC2 instances you want to launch might be represented by an existing AMI or by a custom one that you generate.

3 Create a Launch Configuration:
1 Go to the EC2 Dashboard.
2 Select “Launch Configurations” from the left navigation pane’s “Auto Scaling” section.
3 The “Create launch configuration” button should be clicked.


Launch template name
= highsky_template
Template version description = template_highsky

4 Choose the AMI that you want.

Click = My AMIs
And Click Amazon Machine Image (AMI) [ Image Name ] = auto_image

5 Set up the instance type, key pair, security groups, and, if necessary, any user data scripts.

Choose the instance type = t2.micro

Choose you’re  Key =   – – – – – – 

Choose you’re Network Settings 

6 After reviewing the settings, click “Create launch configuration.

                             Create launch template

4 Create an Auto Scaling Group:
1 Go to the EC2 Dashboard and select “Auto Scaling Groups” from the left navigation pane after creating the launch configuration.


2 Press the “Create an auto-scaling group” button.

Auto Scaling group name = Auto_scaling_group
Launch template = highsky_template
Click = Next

3 The launch configuration you made in the previous stage should be selected.

VPC = ( Default VPC )
Availability Zones and Subnets = [ yure Choose )w
And Click = Next 

4 Configure advanced options – optional: [ Choose a load balancer to distribute incoming traffic for your application across instances to make it more reliable and easily scalable. You can also set options that give you more control over health check replacements and monitoring.]

I’m Choose = No load balancer

5 Health checks [ Health checks increase availability by replacing unhealthy instances. When you use multiple health checks, all are evaluated, and if at least one fails, instance replacement occurs.]

  Health check grace period = 180 Minute
  And Click = Next

6 Set the group’s desired capacity, minimum, and maximum instance counts.

Desired capacity = 1
Minimum capacity = 1
Maximum capacity = 2
And Click = Next

6 Set Up Notifications (Optional):
Notifications can be set up to notify you of scaling events. Email, SMS, and other destinations can receive these updates via Amazon SNS (Simple Notification Service).

Click  =  Next 

7 Test Auto Scaling:
1 Manually start scaling events by simulating traffic or load spikes to make sure your system behaves as you anticipate.
2 Watch how the Auto Scaling group changes the number of instances it has based on the policies you’ve set..

Click = Next

8 Monitoring and upkeep: 
1 Keep a close eye on the performance of your Auto Scaling group and modify scaling rules as necessary to meet your application’s needs.
2 Your instances’ health should be monitored, and any sick instances should be replaced immediately..

And Click = Create Auto Scaling groups 

Check-in Instances

                            Successfully Create Auto Scaling 


15 September 2023

AWS RDS instance start lambda function with Event bridge

1. Open the AWS Management Console: Go to the AWS Management Console and log in to your AWS account.

2. Choose RDS: From the list of AWS services, choose RDS (Relational Database Service).

 3. Click “Create Database”: On the RDS dashboard, click the “Create database” button.

 4. Choose a database engine: Select the engine you want to use for your RDS instance. Amazon RDS supports various database engines like MySQL, PostgreSQL, Oracle, SQL Server, MariaDB, etc.

5. Choose a use case: Select the use case that best fits your needs. This will determine the default settings for your RDS instance, such as the instance class, storage type, and allocated storage.

6 . Configure the instance: Configure the RDS instance by specifying its name, username, and password. You can also choose the instance type, storage type, allocated storage, and other settings based on your requirements.

7. Configure advanced settings: If needed, you can configure advanced settings such as backup retention, maintenance window, security groups, and VPC settings.

8. Launch the instance: After configuring all the settings, review your configuration and click “Create Database” to launch your RDS instance.

9. Please wait for the instance to launch: It may take several minutes for your RDS instance to launch. Once it is ready, you can connect to it using the endpoint provided in the AWS Management Console.

That’s it! You have now created an RDS instance in AWS. You can use this instance to host your database and connect to it from your applications.

IAM service policy

1. Open the IAM Management Console: Go to the AWS Management Console and log in to your AWS account. From the list of AWS services, choose “IAM” under “Security, Identity & Compliance”.

2. Create a new policy: In the left-hand navigation pane, click “Policies”, then click “Create policy”.

3. Select a policy template: On the Create Policy page, you can either create your custom policy or use a pre-defined policy template. To create a policy for RDS, you can select the “Amazon RDS” service from the list of available services.

4. Choose the actions: Next, you need to choose the actions that you want to allow or deny for this policy. For example, you might want to allow read-only access to RDS resources or grant permissions to create and modify RDS resources.

5. Choose the resources: Once you have selected the actions, specify the RDS resources to which this policy applies. You can choose to apply the policy to all resources or specify individual resources by ARN (Amazon Resource Name).


6. Review and create the policy: After specifying the actions and resources, review the policy details and click “Create policy” to save the policy.

7. Attach the policy to a user or group: Once you have created the policy, you need to attach it to a user or group that needs access to RDS resources. You can do this by navigating to the user or group in the IAM console, clicking on the “Permissions” tab, and then attaching the policy to the user or group.

That’s it! You have now created an IAM service policy for RDS and attached it to a user or group. The user or group can now perform the allowed actions on the specified RDS resources.

IAM service role

1. Navigate to the IAM dashboard.

2. Click on “Roles” from the left-hand menu.

3. Click on the “Create role” button.

4. Choose the type of trusted entity for your role: an AWS service, another AWS account, or a web identity provider.

5. Select the policies that define the permissions for your role. You can choose from existing policies or create a custom one.

6. Give your role a name and description.

7. Review your role and click “Create role” to save it.

That’s it! You have now created an IAM service role in AWS. You can use this role to grant permissions to an AWS service or other entities that need to perform actions on your behalf.

Lambda function

1. Navigate to the Lambda dashboard.

2. Click on the “Create function” button.

3. Choose the type of function you want to create. You can create a function, blueprint, or serverless application repository from scratch.

4. Give your function a name and description.

5. Choose a runtime for your function, such as Python, Node.js, or Java.

6. Configure the function’s execution role, which determines the permissions that the function has to access AWS resources.

7. Write your function code or upload a ZIP file containing your code.

 import boto3

# Initialize the RDS client
rds = boto3.client('rds')

# Start the RDS instance
try:
    response = rds.start_db_instance(DBInstanceIdentifier='your-db-instance-id')
    print('RDS instance starting...')
except Exception as e:
    print('Error starting RDS instance:')

8. Set up your function’s environment variables and any additional settings, such as memory and timeout settings. Click “Create function” to save your Lambda function.

After creating your Lambda function, you can test it manually or set up a trigger to invoke it automatically. You can also monitor your function’s performance and troubleshoot any errors using the AWS Lambda console.

  CloudWatch

1. Navigate to the CloudWatch dashboard.

2. Click on “Events” from the left-hand menu.

3. Click on the “Create rule” button.

4. Choose the “Schedule” option under “Event Source”.

5. Configure the croon expression for when you want the RDS DB  instance to start. For example, if you want it to start every day at 8 pm, you would use the expression 25 5 * *? *

6. Choose the EC2 instance as the target for the event rule.


7. Configure the specific action that you want to perform on the RDS DB instance, which in this case is to start it.

8. Give your rule a name and description.

9. Click “Create rule” to save your CloudWatch event rule.


After creating your CloudWatch event rule, it will trigger at the scheduled times and start the specified EC2 instance. Be sure to test your rule to ensure it is working as expected.

STOP THE RDS DB INSTANCE

1. creating IAM policy

2. creating IAM role

4. creating Lambda function RDS-stop-instance and attaching a role

8. creating CloudWatch Choose the “Schedule” option under the “Event Source” rule.

9. Configure the croon expression for when you want the RDS DB  instance to s. For example, if you want it to start every day at 8 pm, you would use the expression 10 6 * *? *


successfully RDS starts to stop the instance


10 August 2023

how to create S3 bucket using Terraform

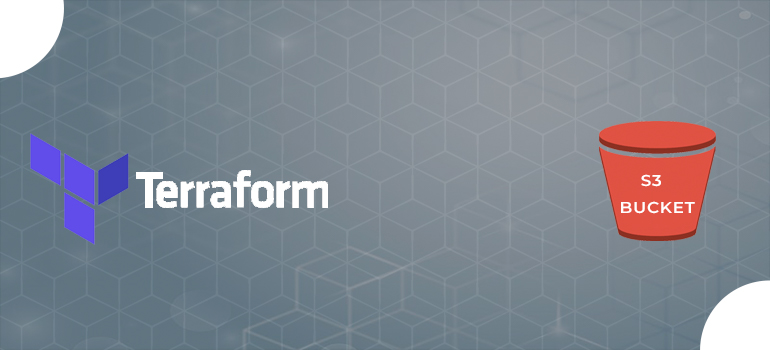
To use Terraform to construct an Amazon S3 bucket, you must define an appropriate resource block in your Terraform setup. Here’s a step-by-step tutorial on creating an S3 bucket with Terraform:

1 Configure AWS Credentials:
Before you continue, make sure you have your AWS credentials set up. You can use the AWS CLI aws configure command or specify them as environment variables.

2 Follow these steps to create a Terraform configuration:
Create a.tf file (for example, main.tf) to define your Terraform setup.

3 Define the S3 Bucket:
Add the following Terraform code to your main.tf file to define an S3 bucket resource:

terraform {
  required_providers {
    aws = {
        source = "hashicorp/aws"
        version = "5.8.0"
    }
  }
}

provider "aws" {
  region     = "ap-south-1"
  access_key = "Your_Access_Key"
  secret_key = "Your_Secrt_Key"

}

resource "aws_s3_bucket" "bucket" {
  bucket = "highskybucket"

  tags = {  
    Name        = "My bucket"
  }
}

Replace “highskybucket” with your S3 bucket’s unique name. Bucket names must be globally distinct throughout AWS.

4 Launch Terraform:
To launch Terraform, browse to the directory containing your Terraform configuration file and execute the following command:

 terraform init

5 Plan the Configuration:
In HashiCorp Terraform, the terraform plan command generates an execution plan outlining the modifications Terraform will make to your infrastructure based on your existing configuration. Without actually making the changes, it demonstrates to you what steps Terraform will take to create, update, or remove resources, for example. By doing so, you may examine and confirm the modifications before implementing them in your infrastructure.

terraform plan

6 Apply the Configuration:
Run the following command to create the AWS s3 Bucket:

terraform apply

7 Review and Confirm:
Terraform will display a plan of what it aims to build. After reviewing the plan, type yes to confirm and create the AWS s3 Bucket.

Output On AWS Infra

And Go To s3 Service 


How To Create IAM User and assign policy to user by Terraform

How to create ec2 instance using terraform


09 August 2023

How To Create IAM User and assign policy to user by Terraform

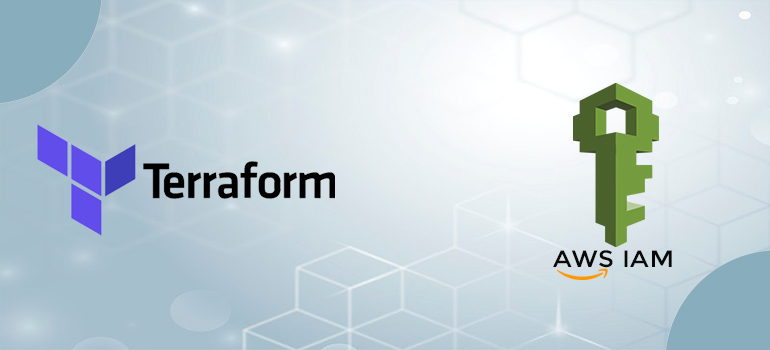
 To use Terraform to establish an AWS user, use the aws_iam_user resource given by the AWS provider. Here’s a step-by-step tutorial for creating an AWS user with Terraform.

1 Configure AWS Credentials:
Make sure you have your AWS credentials set up before you begin. You may either specify them as environment variables or use the AWS CLI aws configure command.

2 Create a Terraform configuration by following these steps:
To define your Terraform setup, create a.tf file (for example, main.tf).

3 Create an AWS User Resource:
To define the AWS user resource, add the following code to your main.tf file:

terraform {
  required_providers {
    aws = {
      source  = "hashicorp/aws"
      version = "~> 5.0"     }
  }
}

provider "aws" {
  region     = "ap-south-1"
  access_key = "your_Access_Key"
  secret_key = "Your_Secret_Key"

}


resource "aws_iam_user" "example_user" {
  name = "nitin_user"
}


resource "aws_iam_access_key" "kye1" {
  user = aws_iam_user.example_user.id

}


output "secret_key" {
  value     = aws_iam_access_key.kye1.secret
  sensitive = true
}


output "access_key" {
  value = aws_iam_access_key.kye1.id

}


resource "aws_iam_policy_attachment" "test-attach" {
  name       = "test-attachment"
  users      = [aws_iam_user.example_user.name]
#   roles      = [aws_iam_role.role.name]
#   groups     = [aws_iam_group.group.name]
  policy_arn = "arn:aws:iam::aws:policy/ReadOnlyAccess"
}

4 Initialize Terraform:
To start Terraform, navigate to the directory containing your Terraform configuration file and run the following command:

 terraform init

5 Plan the Configuration:
In HashiCorp Terraform, the terraform plan command generates an execution plan outlining the modifications Terraform will make to your infrastructure based on your existing configuration. Without actually making the changes, it demonstrates to you what steps Terraform will take to create, update, or remove resources, for example. By doing so, you may examine and confirm the modifications before implementing them in your infrastructure.

terraform plan

6 Apply the Configuration:
Run the following command to create the AWS user:

terraform apply

7 Review and Confirm:
Terraform will display a plan of what it aims to build. After reviewing the plan, type yes to confirm and create the AWS user.

Output On AWS Infra

And Check Policy 

How to create ec2 instance using terraform


07 August 2023

How to create ec2 instance using terraform

What is Terraform

HashiCorp’s Terraform is an open-source infrastructure as code (IaC) tool. It enables you to use a declarative configuration language to define and manage your cloud infrastructure resources and services. You may use Terraform to automatically supply and manage a variety of infrastructure parts, including virtual machines, networks, storage, and more, across numerous cloud providers or on-premises environments.

1 Declarative Configuration: You identify the resources you require, their configurations, and relationships in a declarative configuration file that is often written in the HashiCorp Configuration Language, or HCL.

2 Provider Support: Numerous cloud service providers (such as AWS, Azure, Google Cloud, etc.) and other infrastructure elements (such as Docker, Kubernetes, etc.) are supported by Terraform. Terraform can be used to manage the resources and configurations that each supplier has to provide.

3 Versioning and Collaboration: Versioning and storing Terraform configurations in version control platforms like Git allows for team collaboration and preserves an audit trail of modifications.

4 Idempotency: Terraform operates under the idempotency principle, allowing you to apply the same configuration repeatedly without experiencing unintended consequences. To get the infrastructure to the desired state, Terraform will only perform the required adjustments.

5 Plan and Apply: When you modify your configuration file, Terraform can provide an execution plan that outlines the changes that will be performed to your infrastructure. After reviewing the strategy, you implemented it to bring about the desired improvements.

6 State Management: Your infrastructure’s current state is recorded by Terraform in a state file. This file aids Terraform in comprehending the configurations and resources that are currently deployed. It is crucial for updating and maintaining your infrastructure.

Compared to manual intervention, Terraform substantially simplifies the provisioning and management of infrastructure. It makes it possible to use infrastructure as code techniques, which facilitate the replication of environments, the management of modifications, and the maintenance of consistency throughout various stages of development and deployment.

Create ec2 instance

terraform {
required_providers {
aws = {
source = "hashicorp/aws"
version = "5.8.0"
}
}
}

provider "aws" {
region = "ap-south-1"
access_key = "Access_Key"
secret_key = "Secret_Key"

}

resource "aws_vpc" "my_vpc" {
cidr_block = "10.0.0.0/16"

tags = {
name = "MyVPC"
}

}

resource "aws_subnet" "public_subnet" {
vpc_id = aws_vpc.my_vpc.id
cidr_block = "10.0.1.0/24"
map_public_ip_on_launch = true
availability_zone = "ap-south-1a"

tags = {
Name = "public1"
}
}

resource "aws_subnet" "private_subnet" {
vpc_id = aws_vpc.my_vpc.id
cidr_block = "10.0.2.0/24"

availability_zone = "ap-south-1a"

tags = {
Name = "private1"
}

}

resource "aws_internet_gateway" "igw" {
vpc_id = aws_vpc.my_vpc.id

}


resource "aws_route_table" "PublicRT" {
vpc_id = aws_vpc.my_vpc.id

route {
cidr_block = "0.0.0.0/0"
gateway_id = aws_internet_gateway.igw.id
}
}

resource "aws_route_table_association" "a" {
subnet_id = aws_subnet.public_subnet.id
route_table_id = aws_route_table.PublicRT.id
}

resource "aws_security_group" "my_nsg" {
name = "my_nsg"
description = "Allow all inbound traffic"
vpc_id = aws_vpc.my_vpc.id

ingress {
description = "ssh from VPC"
from_port = 22
to_port = 22
protocol = "tcp"
cidr_blocks = ["0.0.0.0/0"]

}

ingress {
description = "http"
from_port = 80
to_port = 80
protocol = "tcp"
cidr_blocks = [ "0.0.0.0/0" ]
}

egress {
from_port = 0
to_port = 0
protocol = "-1"
cidr_blocks = ["0.0.0.0/0"]

}
}

resource "aws_instance" "instance" {
ami = "ami-072ec8f4ea4a6f2cf"
vpc_security_group_ids = [aws_security_group.my_nsg.id]
instance_type = "t2.micro"
subnet_id = aws_subnet.public_subnet.id
key_name = aws_key_pair.sky_key.key_name
tags = {
Name = "highsky instace"
}

}


resource "aws_key_pair" "sky_key" {
  key_name = "sky_key"
  public_key = tls_private_key.rsa.public_key_openssh
}


resource "local_file" "tf_key" {
  content = tls_private_key.rsa.private_key_pem
  filename = "tfkey.pem"  
}

resource "tls_private_key" "rsa" {
  algorithm = "RSA"
  rsa_bits = 4096
  
}


output "publicip" {
  value = aws_instance.instance.public_ip
}

1 The HashiCorp Terraform infrastructure as code (IaC) tool uses the terraform init command to initialize new or existing Terraform configurations in directories. Terraform creates the environment, downloads provider plugins, and gets the directory ready for controlling your infrastructure when you run Terraform init.

terraform init

2 In HashiCorp Terraform, the terraform plan command generates an execution plan outlining the modifications Terraform will make to your infrastructure based on your existing configuration. Without actually making the changes, it demonstrates to you what steps Terraform will take to create, update, or remove resources, for example. By doing so, you may examine and confirm the modifications before implementing them in your infrastructure.

terraform plan

3 In HashiCorp Terraform, the changes specified in your configuration are applied to your infrastructure using the Terraform apply command. This command executes the operations required to create, update, or delete resources in accordance with your settings using the execution plan produced by Terraform plan.

terraform apply

yes

 Output On AWS Infra


22 June 2023

How To Configure API Gateway With AWS Lambda Function Integration

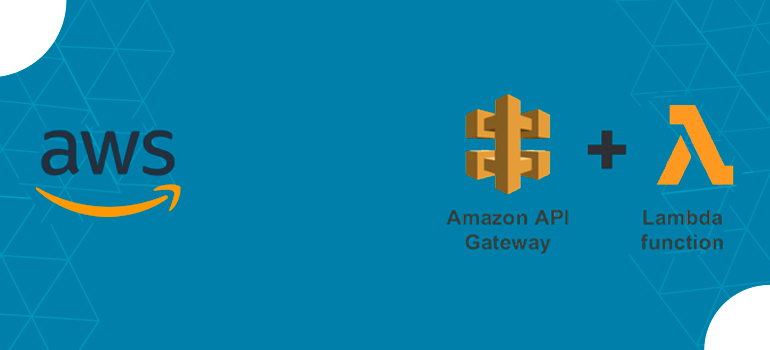
An API Gateway serves as a common entry point for APIs (Application Programming Interfaces), a service offered by cloud computing platforms like Amazon Web Services (AWS). It offers a managed option for safely and scalable developing, deploying, and managing APIs.

Clients can access and interact with the functionality and data offered by backend services by using API Gateway, which acts as a proxy between clients and those services. It serves as a gatekeeper or middleman that receives and processes API requests before sending them to the proper backend service.

API Gateway delivers the following crucial advantages and features:

( 1 ) Create and manage APIs with API Gateway. This includes specifying resources, methods (such as GET, POST, PUT, and DELETE), and the request/response structures that go with each. It offers a method for structuring and organizing your APIs, which makes them simpler to maintain.

( 2 ) Authentication, validation, transformation, and mapping are just a few of the actions that API Gateway can carry out on incoming requests. This gives you the chance to edit or tailor the requests before they go to the backend services, ensuring that they follow any security or format requirements.

( 3 ) Access control and security: API Gateway has built-in security mechanisms to safeguard your APIs and the exposed data. It supports a variety of authentication methods, including OAuth, API keys, AWS Cognito, and AWS Identity and Access Management (IAM) roles. By doing so, you can manage API access and user or client application authentication.

( 4 ) Scalability and performance: API Gateway is built to handle large numbers of API requests and can scale dynamically to address changing traffic loads. It offers caching solutions to enhance performance and lighten the burden on backend services. For further management and control of the usage of your APIs, it includes rate restriction and throttling.

( 5 ) Integration with Backend Services: API Gateway enables integration with a variety of backend services, including Amazon EC2 instances, AWS Lambda functions, and HTTP endpoints. This makes it possible for you to use already-existing services or create new ones to provide the functionality demanded by your APIs.

( 6 ) Monitoring and analytics: API Gateway gives you the logging and tracking tools you need to keep tabs on your APIs’ performance, failures, and usage. You can monitor and gather information about the usage and health of your APIs thanks to its integration with services like AWS CloudWatch.

You may streamline the creation, deployment, and management of APIs by using API Gateway, while also transferring many operational problems to the managed service. In addition to providing a scalable and secure gateway for API connection, it aids in isolating client applications from backend services.

Lambda function

1. Navigate to the Lambda dashboard.

2. Click on the “Create function” button.

3. Choose the type of function you want to create. You can create a function, blueprint, or serverless application repository from scratch.

4. Give your function a name and description.

5. Choose a runtime for your function, such as Python, Node.js, or Java.

( A runtime is a version of a programming language or framework that you can use to write Lambda functions. Lambda supports runtime versions for Node.js, Python, Ruby, Go, Java, C# (.NET Core), and PowerShell (.NET Core)

To use other languages in Lambda, you can create your own runtime.

Note that the console code editor supports only Node.js, Python, and Ruby. If you choose a compiled language, such as Java or C#, you edit and compile your code in your preferred SDE and upload a deployment package to the function. )

Taking by Python 3.1 

6. Configure the function’s execution role, which determines the permissions that the function has to access AWS

Change default execution role
Execution role
Choose a role that defines the permissions of your function. To create a custom role, go to the IAM console
Create a new role with basic Lambda permissions

Click = Create function

Successfully created the function = highsky-function.

API Gateway 

1 Open the API Gateway service: Once logged in, look for “API Gateway” in the “Networking & Content Delivery” section or in the search box of the AWS Management Console.

2 Click on “Create API”: To begin building a new API, use the “Create API” option from the API Gateway service dashboard.

3 Choose the API type: Choose either “REST API” or “WebSocket API” depending on the type of API you want to build. While WebSocket APIs allow for bidirectional communication through the WebSocket protocol, REST APIs are frequently utilised for HTTP-based communication.

4 Select a protocol: Choose whether HTTP or HTTPs is the protocol you wish to use if you decide to develop a REST API. While HTTP is suitable for testing and development, HTTPS is advised for use in operational settings.

Click = Bulid

Click = Ok 

5 Choose a name for your API: 

Click = New API 

Choose a name for your API: Give your API a name that clarifies its function.

Choose an endpoint type:

Click = Create API 

API name* = highsky-API

Description = API-highsky

Endpoint Type = Regional

Click = Create API 

Configure the API: Create the API configuration by specifying the resources, methods, and integrations. To add a method to a resource (such as GET, POST, or PUT), click “Create Method”.

Click = Actions 
Click = Create Method 

Click  = Save 

Click = Lambda highsky-function

Test = function

Go to API Gateway  

Click = Actions and Deploy API

Click = Deploy 

Click the = Invoke URL

Successfully


13 June 2023

how to launch and connect windows server ec2 instance AWS

1 Once you have logged in, go to the EC2 service to start it up. Either use the top search bar to look for “EC2” or browse the “Compute” section to find it.

2 Start a new instance: To begin building a new EC2 instance, click the “Launch Instance” button.

3 You will be asked to select an Amazon Machine Image (AMI) during the instance launch wizard. To find the Windows Server AMI of your choosing, select the “AWS Marketplace” tab and conduct a search. There are several versions offered, including Windows Server 2019, 2016, and others. By clicking the “Select” button, you can choose the AMI that best meets your needs.

( 1 ) Instance = highsky-windows-server1

( 2 ) Application and OS Images (Amazon Machine Image) = Windows. Microsoft 

4. Select a type of instance: Depending on the resources and performance you require, choose the instance type. You have the option of selecting a general-purpose instance or a particular instance type. After making your choice, pick “Next: Configure Instance Details” from the menu.

5. Configure instance details: Various settings, including the number of instances, network configurations, storage, security groups, and more, can be made in this area. When you have finished, click the “Next: Add Storage” option. Adjust the settings as necessary.

6. Add storage by setting up your instance’s storage options. If necessary, you can change the default storage size or add more volumes. After making your modifications, select “Next: Add Tags” from the menu.

7.  You can optionally add tags to your instance to improve management and organisation. Key-value pairs called tags are a way of identifying and classifying resources. When you’re ready, press the “Next: Configure Security Group” button.

8.  Setting up a security group will allow you to manage the inbound and outgoing traffic to your instance. A new security group can be made, or you can choose an existing one. For your Windows Server instance, make sure to enable inbound traffic that is required, such as Remote Desktop Protocol (RDP) for remote access. When you’re done, press the “Review and Launch” button.

9.  Review everything you’ve configured for your instance before launching it. Click the “Launch” button if everything appears to be in order.

10.  Choose or create a key pair: If you don’t already have a key pair, you’ll be asked to do so. For safe login to your instance, key pairs are utilised. Save the private key file (.pem) that you downloaded in a secure location. After downloading the key pair, select “Launch Instances” from the menu.

11. Launch status: A notification confirming that your instances are launching will appear. To access the EC2 dashboard, click the “View Instances” option.

12. Connect to your instance by choosing it from the list and clicking the “Connect” button after it has started operating. To connect to your Windows Server instance using Remote Desktop Protocol (RDP), adhere to the recommended steps.

I’m done now! AWS has acknowledged your successful creation of a Windows Server EC2 instance. Now you can use it for the settings and applications you like.

Connect to your Windows instance using RDP

1. When utilising Remote Desktop to login to your Windows instance, you must first locate the initial administrator password and then input it. After the instance launches, it takes some time before this password becomes accessible.

2. The name of the administrator account is determined by the operating system’s language. For instance, the correct term is Administrator for English, Administrator for French, and Administrator for Portuguese. See the Microsoft TechNet Wiki for more details.

3. You can access your instance using the domain credentials you’ve specified in AWS Directory Service if you’ve joined your instance to a domain. Use the administrator’s fully qualified user name on the Remote Desktop login screen in place of the local computer’s name and the generated password.

4. When the instance was launched, you created a private key (.pem) file; select Browse and go to that location. To copy the whole contents of the file to this window, choose the file and then select Open.

5. Decrypt Password is your option. In place of the previous Get password link, the console now shows the instance’s default administrator password under Password. Keep the password in a secure location. In order to connect to the instance, you must enter this password.

6. Select Download file from remote desktop. You are given the option to open or save the RDP shortcut file using your browser. To get back to the Instances page when you have completed downloading the file, select Cancel.

( 1 ) You would see the Remote Desktop Connection dialogue box if you opened the RDP file.

( 2 ) If you saved the RDP file, open it by going to your downloads directory and clicking it to bring up a dialogue box.

7. You can be informed that the remote connection’s publisher is unknown. To maintain your connection to your instance, select Connect.

8. The default selection is the administrator account. The saved password should be copied and pasted.

9. You might see a warning that the security certificate could not be validated because of the nature of self-signed certificates. Use the next several steps to confirm the remote computer’s identification, or just select Yes (Windows) or Continue (Mac OS X) if you believe the certificate.

Successfully EC2 instance Windows Server connect 


12 June 2023

How to take AMI of EC2 and launch new EC2 using AMI

1. Activate the EC2 service: After logging in, choose the EC2 service from the list of accessible services to navigate to it.

2. To launch an instance, select the “Launch Instance” button on the EC2 dashboard. This will launch the procedure for creating an instance.

3. Selecting an AMI from Amazon Choose an AMI that meets your needs. AWS offers pre-configured AMIs, or you can utilize your own custom AMI.

4. Select a type of instance: Select the “C5” family, followed by the “c5.xlarge” instance type, in the “Choose Instance Type” section.

5. Configure instance details, including the number of instances, network configurations, and storage choices, based on your requirements. In case you’re unsure, you can leave most of the options alone.

6. Add storage by specifying how much space your EC2 instance needs. Depending on your requirements, you can change the storage’s size, composition, and configuration

7. Set up security groups: Security groups manage the traffic entering and leaving your EC2 instance. Set the security group up to permit access to the ports and protocols required for your use case.

8. Review the setup options you’ve chosen before launching se. Click the “Launch” button if everything appears to be in order.

9. Choose an existing key pair or generate a new one: You must build a key pair in this step in order to securely connect to your EC2 instance. A fresh key pair can be generated or an old one used. Ensure that you download the private key file (.pem) and save it safely.

10. Launch the instance: To launch your EC2 instance after choosing a key pair, click the “Launch Instances” button. It will begin provisioning the instance.

11. Once your EC2 instance is up and running, you can connect to it and access it via SSH or other remote access protocols. To create a secure connection to your instance, use the private key file you downloaded earlier.

I’m done now! You have successfully established an EC2 instance of the high-performance computing capable “c5.xlarge” instance type. Keep in mind to manage and monitor your EC2 instances according to the demands of your workflow.

( 1 ) Navigate to the EC2 Dashboard by clicking on the “Services” dropdown menu, selecting “Compute,” and then clicking on “EC2.”

( 2 ) Click on the “Launch Instance” button.

( 3 ) Select the Amazon Machine Image (AMI) you want to use for your instance.

( 4 ) Choose the instance type that best fits your needs.

( 5 ) Configure the instance details, including the number of instances you want to launch, network settings, and storage.

( 6 )  Add any additional tags, if desired, to help you identify your instance.

( 7 )  Configure security groups to control inbound and outbound traffic to your instance.

( 8 )  Review your configuration and launch your instance.

And click the Instances

Click = Connect .. And connect instance 

( 1 )  Apache Web Server install ( httpd)

sudo yum install httpd -y

( 2 ) Activate Apache and start it:
Start the service and make Apache boot up automatically after installation.

sudo systemctl start httpd

Go to EC2 Dashboard 

( 1 ) Click = Actions
( 2 ) Click = Image and templates
( 3 ) Create image

1 Create an image (AMI) : When the instance is selected, click the “Actions” dropdown menu and select “Create Image” (you can also right-click the instance to access this menu as well).

2 Configure the image settings: Give the image a special name and description in the “Create Image” dialogue box. Additionally, you can decide whether to restart the instance before to making the picture, which is advised for data consistency. To begin creating an image, click “Create Image”.

( 1 ) Image name = highsky-image 
( 2 ) Image description – optional = highsky-image 

3 Monitor image creation: It can require a few minutes to create a picture. The EC2 interface allows you to keep tabs on the development. The image will be accessible in the AMIs section once the image creation is complete.

Click = Create image

 Go to EC2 Dashboard / Images / AMIs 

4 Launch a new EC2 instance from the image: To launch the instance creation wizard, select “Launch Instance” from the EC2 dashboard.

5 Instances name = highsky2-image 

6 Choose an Amazon Machine Image (AMI): Click the “My AMIs” tab in the “Instance Creation Wizard’s first step. The picture you made in the previous step ought to appear. Choose it to serve as the new instance’s base image.

7 Configure instance details: Set up the instance’s specifics, including the instance type, network configurations, storage options, and security groups, in accordance with your needs. Examine other settings, and make necessary changes.

And click the Instances

Click = Connect .. And connect instance 

yum install httpd -y


09 June 2023

How To Grant Access To User To Access Only One s3 Bucket

First, we need to create an s3 Bucket steps are given below:

To bucket create
1 highsky1
2 highsky2

1 ( highsky1 )
Step 1: Log on to your AWS Console.
Step 2: go to the Search bar  ” S3 services “

Step 3: Click on S3  Scalable Storage in the Cloud” and proceed further

Step 4: Create a new Bucket

In the general configuration category:

Step 5: Enter the bucket name  ( highsky1 ) 

Step 6: Next, choose the  AWS region,  [Asia Pacific (Mumbai) ap-south-1].

ACLs disabled (Recommended)

Bucket owner enforced – Bucket and object ACLs are disabled, and you, as the bucket owner, automatically own and have full control over every object in the bucket. Access control for your bucket and the objects in it is based on policies such as AWS Identity and Access Management (IAM) user policies and S3 bucket policies Objects can be uploaded to your bucket only if they don t specify an ACL or if they use the bucket-owner-full-control canned ACL.

Block Public Access settings for this bucket

Public access is granted to buckets and objects through access control lists (ACLs), bucket policies, access point policies, or all. In order to ensure that public access to this bucket and its objects is blocked, turn on Block all public access. These settings apply only to this bucket and its access points. AWS recommends that you turn on Block all public access, but before applying any of these settings, ensure that your applications will work correctly without public access. If you require some level of public access to this bucket or objects within, you can customize the individual settings below to suit your specific storage use cases

Bucket Versioning

Versioning is a means of keeping multiple variants of an object in the same bucket. You can use versioning to preserve, retrieve, and restore every version of every object stored in your Amazon S3 bucket. With versioning, you can easily recover from both unintended user actions and application failures.

Disable

( choose the Disable )

Default encryption

The default encryption configuration of an S3 bucket is always enabled and is at a minimum set to server-side encryption with Amazon S3-managed keys (SSE-S3). With server-side encryption, Amazon S3 encrypts an object before saving it to disk and decrypts it when you download the object. Encryption doesn’t change the way that you access data as an authorized user. It only further protects your data. You can configure default encryption for a bucket. You can use either server-side encryption with Amazon S3 managed keys (SSE-S3) (the default) or server-side encryption with AWS Key Management Service (AWS KMS) keys (SSE-KMS).

Amazon S3 managed keys (SSE-S3)

( Choose the  Amazon S3 managed keys (SSE-S3) )

Bucket Key = Enabel

Step 7: Click on Create Bucket.

If the bucket is created successfully, you will see a message like this on the top of the page:

2 ( highsky2 ) 

2 Creating an IAM (Identity and Access Management) service in AWS (Amazon Web Services) can  be done by following these steps:

( 1 Create a Policy )  2 ( Create User )

1 Create Policy
( 1 ) Go to the IAM service by searching for it in the search bar or selecting it from the list of services.

1. Go to the IAM service by searching for it in the search bar or selecting it from the list of services.

2. Once in the IAM console, click on the “Policies” tab in the left-hand menu.

3. Click the “Create policy” button.

4. Choose either the “Visual editor” or the “JSON” tab to create the policy.

5. choose the Visual editor tab to select the service the policy will apply to and then choose the actions and resources the policy will allow or deny

( 1 ) Select the “JSON” tab.
( 2 ) Define the policy document using the JSON syntax. The policy document specifies the permissions and resources that the policy grants or denies.
( 3 ) Make sure to include the necessary actions, resources, and conditions according to your requirements.
( 4 ) Click on the “Review policy” button.
( 5 ) Provide a name and optional description for your policy.
( 6 ) Review the policy details and click on the “Create policy” button to finalize it.


 {
  "Version": "2012-10-17",
  "Statement": [
    {
      "Sid": "Stmt1686230148773",
      "Action": [
        "s3:ListAllMyBuckets"
      ],
      "Effect": "Allow",
      "Resource": "*"
    },
    {
      "Sid": "Stmt1686230216901",
      "Action": "s3:*",
      "Effect": "Allow",
      "Resource": "arn:aws:s3:::Your Bucket Name "
    }
    {
      "Sid": "Stmt1686230222829",
      "Action": "s3:*",
      "Effect": "Allow",
      "Resource": "arn:aws:s3:::Your Bucket Name /*"
    }
  ]
}

Click Next 

Full permission  in Bucket ( highsky1

( 7 ) Policy Name File ( permission-policy )

And Click ( Create policy )

Once the policy is created, you can attach it to a user, group, or role in IAM. When the user, group, or role tries to access a resource, the policy will be checked to determine whether the action is allowed or denied.

It’s important to test your policy to ensure that it’s providing the intended access and restrictions.  can do this by using the Simulate policy feature in the IAM console, which lets you simulate a policy to see how it would apply in different scenarios

2 Create User 

1. Once in the IAM console, click on the “Users” tab in the left-hand menu.

2. Click the “Add user” button.

3. Enter a name for the new user and select the “Programmatic access” checkbox to give the user access to AWS via APIs, CLI, and SDKs.

4. Password ( Harry@123 )

5. Click “Next: Permissions” to assign the user permissions.

Click ( Next )

6. Click Create User to create a new user.

Once the user is created, you’ll be provided an Access Key ID and a Secret Access Key, which you can use to programmatically access AWS services. Be sure to keep these credentials safe, as they provide access to your AWS resources.

Click Download .csv file

Login Harry user 

Go To the S3 service

1 highsky1 ( He has full permission, he can upload data in this and also delete ) 

2 highsky2 ( Can See And Do Nothing ) 


WhatsApp chat