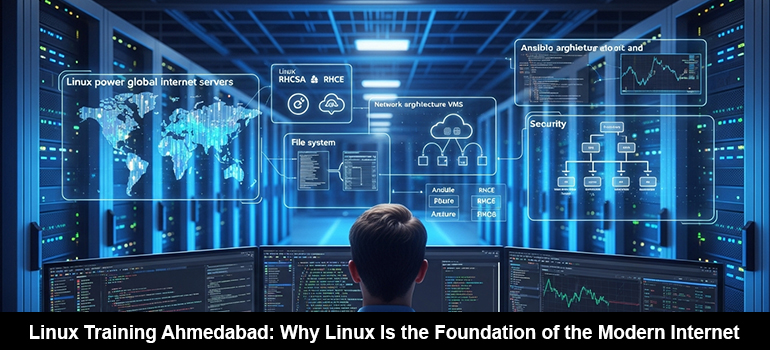
Data Science Training Ahmedabad
08 November 2023

Want to Improve your Data Science skills? Join a Certification program for Career Growth

If you are interested in making a career in data science, then there is a high possibility to get a lucrative job role. There is a growing demand for skilled professionals in the IT industry. More and more business corporates are in need of data scientists who have updated competence in analyzing data. It can be standard or complex sets that help companies make more informed decisions by interpreting the data. Therefore, you should have Data Science Certification in Ahmedabad that proves your knowledge in data science knowledge and in which cases you can use them.

How joining Data Science Certification programs can be valuable?

Having a data science certificate might not be a comprehensive solution for all your IT skills needs. But if you have a career in the IT sector, it can help you get a better job role while growing your skills. You can grow your experience in understanding various data sets and stay updated on how to use and comprehend data that are required for current IT trends. So, you should improve your qualifications as per the needs of your job role as a data analyst. Data scientists can also gain more skills to use the right algorithm for business data training with Microsoft Azure Training & Certification in Ahmedabad. If you work with data on the AWS platform, you can get benefits from the AWS Security Training Course in Ahmedabad. You can learn about working with a range of cloud-based services.

Today, businesses in various industries depend more on data scientists to handle the increasing volume of data created and compiled. This is where data science can play an increasingly important role in a variety of sectors, offering a plethora of career possibilities. All you have to do is have the proper qualifications to become a data scientist. Hence, taking data science certification programs is worthwhile. HighSkyIT Solution offers data science certification sources that enable you to possess skills on both Azure and AWS. So you can effectively tackle all your data science projects.

Conclusion:

Data science is a dynamic field in the IT realm that offers chances for study and job advancements with ever-evolving technology and approaches. Hence, you should enroll in a data science certification program that enables you to stay current on the newest tools and trendy strategies. It will help you become a competitive and productive professional in the industry. Whether you want to become a data analyst or a big data engineer, to meet the need for evolving skills, taking on these certification courses can be helpful in career growth.

26 October 2023

How to install phpmyadmin in ubuntu 22.04

This instruction is based on the assumption that you are installing phpMyAdmin on a system, sometimes known as a local system, that is not publicly available via the Internet. Installing phpMyAdmin on Ubuntu 20.04 or 22.04 requires the following steps:

Step 1: Update Your System
To update the Ubuntu package repository and installed packages, use the command line and utilize the apt package manager:

sudo apt update && sudo apt upgrade -y

2..1Step 2: Installing MySQL 

MySQL may be installed on Ubuntu 22.04 by utilizing the APT package repository. As of this writing, MySQL 8.0.28 is the version that is available in the Ubuntu repository by default.
If you haven’t updated the package index on your server lately, do so before installing it:

apt install mysql-server -y

1 Start the service and make the Mysql. service boot up automatically after installation.

Use the systemctl start command to make sure the server is up and running:

systemctl start mysql.service
systemctl enable mysql.service

Setp:3 Install PHP
PHP is a free and open-source server-side programming language that can be used to create a variety of different things, including apps, websites, and CRMs. PHP is a language used for server-side programming. It’s a fairly popular programming language with a wide range of applications. It can also be incorporated into HTML. PHP has remained one of the most popular programming languages in the development field because it can operate with HTML. The reason behind this is that PHP helps to make the HTML code simpler.

apt install php -y

Step: 4 Install phpMyAdmin 
To install phpMyAdmin and its dependencies, do the following command:

apt install phpmyadmin -y

1 When the installer asks to configure a web server automatically, you must select one. If Apache is used by the system, the apache2 option is already highlighted. To choose Apache2, press Space. To highlight OK, press Tab.

2 Press Enter to confirm the selection 

3 The installation makes phpmyadmin the default user. After entering a strong password, press Enter to access the phpmyadmin user.

4 Confirm the password and press Enter.

5 Press Enter to confirm the selection

Step: 5 Check your IP address

ifconfig

My Server IP

192.168.1.36

Open Firefox Web Browser And Search

192.168.1.36/phpmyadmin

PHPMyAdmin running

Step:6 Mysql Secure Installation Create Database And Create a User 

1 Mysql Secure Installation

mysql_secure_installation

Securing the MySQL server deployment.

Connecting to MySQL using a blank password.

VALIDATE PASSWORD COMPONENT can be used to test passwords
and improve security. It checks the strength of password
and allows the users to set only those passwords which are
secure enough. Would you like to setup VALIDATE PASSWORD component?

Press y|Y for Yes, any other key for No: y

There are three levels of password validation policy:

LOW Length >= 8
MEDIUM Length >= 8, numeric, mixed case, and special characters
STRONG Length >= 8, numeric, mixed case, special characters and dictionary file

Please enter 0 = LOW, 1 = MEDIUM and 2 = STRONG: 0

Skipping password set for root as authentication with auth_socket is used by default.
If you would like to use password authentication instead, this can be done with the “ALTER_USER” command.
See https://dev.mysql.com/doc/refman/8.0/en/alter-user.html#alter-user-password-management for more information.

By default, a MySQL installation has an anonymous user,
allowing anyone to log into MySQL without having to have
a user account created for them. This is intended only for
testing, and to make the installation go a bit smoother.
You should remove them before moving into a production
environment.

Remove anonymous users? (Press y|Y for Yes, any other key for No) : y
Success.
Normally, root should only be allowed to connect from
‘localhost’. This ensures that someone cannot guess at
the root password from the network.

Disallow root login remotely? (Press y|Y for Yes, any other key for No) : y
Success.

By default, MySQL comes with a database named ‘test’ that
anyone can access. This is also intended only for testing,
and should be removed before moving into a production
environment.

Remove test database and access to it? (Press y|Y for Yes, any other key for No) : y
Success.

By default, MySQL comes with a database named ‘test’ that
anyone can access. This is also intended only for testing,
and should be removed before moving into a production
environment.

Remove test database and access to it? (Press y|Y for Yes, any other key for No) : y

Success.

All done! 

2 Create a Database 

mysql -r -p

Enter password: **** yure Password

CREATE DATABASE highsky_db;

Query OK, 1 row affected (0.04 sec)

SHOW DATABASES;
mysql> SHOW DATABASES;
+--------------------+
| Database           |
+--------------------+
| highsky_db         |
| information_schema |
| mysql              |
| performance_schema |
| phpmyadmin         |
| sys                |
+--------------------+
6 rows in set (0.03 sec)

3 Create a Mysql User 

CREATE USER Harry@'%' IDENTIFIED BY 'harry@123';

Query OK, 0 rows affected (0.08 sec)

3 Grant privileges to the database user on the database.

GRANT ALL ON highsky_db.* TO Harry@'%';

Query OK, 0 rows affected (0.01 sec)

4  Flush privileges and exit the Mysql console.

FLUSH PRIVILEGES;

Query OK, 0 rows affected (0.01 sec)

Exit And Restart MySQL And Enable

systemctl restart mysql.service
systemctl enable mysql.service

Step 7 Restart the Apache2 service after that to make the latest PHP configuration modifications.

systemctl restart apache2
systemctl enable apache2

Step 8 Open Firefox Web Browser And Search

Username: Harry

Password: harry@123

And Click Go

And Database

10 October 2023

What is Nodejs And install Nodejs

What is Node.js

An open-source server-side runtime environment for JavaScript called Node.js enables you to execute JavaScript code on the server. It is made for creating scalable and effective network applications, and it is widely used to create web applications, APIs, and other server-side programs.

1 JavaScript Runtime:- Node.js enables you to execute JavaScript code on the server, whereas JavaScript is typically associated with web browsers for client-side scripting.

2 Single-Threaded:- Although Node.js applications are single-threaded, they may effectively manage several concurrent tasks by using callbacks and asynchronous activities. For some applications, this may lead to better performance.

3 Event-Driven and Non-Blocking:- An event-driven, non-blocking I/O mechanism is the foundation of Node.js. This indicates that it can manage numerous connections simultaneously without delaying the execution of any code. Applications that demand a lot of concurrency and real-time communication are especially well suited for it.

4 Package Manager (npm):- The npm (Node Package Manager) ecosystem of open-source libraries and modules that come with Node.js allows developers to expand the capabilities of the framework and make the process of creating applications more straightforward. ion.

5 V8 JavaScript Engine:- The V8 JavaScript engine, created by Google and renowned for its great performance, is used by Node.js. V8 is quick and effective because JavaScript code is compiled into machine code. n.

6 Cross-Platform:- Node.js is extremely portable since it supports many different operating systems, including Windows, macOS, and many Unix-like platforms.

7 Large and Active Community:- A large number of resources, libraries, and tools are available for Node.js development because of the dynamic and active developer community that supports it.

The development of web servers and web applications, real-time applications like chat programs and online games, the creation of APIs, and the creation of command-line tools are just a few examples of common Node.js use cases. Its popularity has increased in part as a result of its adaptability in creating various applications and its ability to handle asynchronous I/O activities effectively.

install Node js

The Node.js official website provides a yum repository that must first be enabled on your system. Additionally, you require development tools to create native add-ons that may be installed on your system.

The default repositories of Rhel include a version of Node.js that can be used to deliver a consistent user experience across several platforms. Version 12.22.9 is what is currently available in the repository. While not the most recent version, this one should be reliable and sufficient for fast language testing.

1 You can use the yum package manager to obtain this version. First, update your local package index by typing:

yum update
yum install nodejs

To confirm installation, click Y when prompted. If you are asked to restart any services, hit ENTER to proceed with the default settings. Ask the node for its version number to confirm the installation was successful:

node -v

This is all there is to getting started with Node.js if the package in the repositories meets your needs. You should typically install npm, the Node.js package manager, as well. You can accomplish this by using yum to install the npm package:

2 You don’t need to install npm individually because the NodeSource nodejs package includes both the node binaries and npm.

By using apt and the NodeSource PPA, you have now successfully installed Node.js and npm. The installation and management of several Node.js versions are covered in the section that follows.

yum install npm


3 The Node Version Manager is Used to Install Node

The Node Version Manager, or nvm, is a further flexible method of installing Node.js. You can simultaneously install and maintain numerous independent Node.js versions and their corresponding Node packages with this piece of software.

The project’s GitHub page can be accessed to learn how to install NVM on a Rhel 9 computer. The README file is displayed on the main page. Copy the curl command from there. This will provide you with the installation script’s most recent version.

It is usually a good idea to audit the script to ensure it isn’t doing anything you disagree with before papering the command through to bash. Remove the | bash element from the end of the curl command to accomplish that:

curl -o- https://raw.githubusercontent.com/nvm-sh/nvm/v0.39.1/install.sh


Make sure you understand the adjustments it is making by taking a look. Run the command once more with | bash appended after you are finished. As of right now, the script can be downloaded and run by typing: The URL you use will change based on the most recent version of nvm.

curl -o- https://raw.githubusercontent.com/nvm-sh/nvm/v0.39.1/install.sh | bash

The nvm script will be installed on your user account as a result. You need to source your.bashrc file first before using it:

source ~/.bashrc

You can now inquire NVM about the Node versions that are offered:

nvm list-remote

The list is pretty lengthy! Any of the release versions you see can be typed to install a particular version of Node. For example, you can enter the following to obtain version v16.14.0 (another LTS release):

nvm install v16.14.0

If you type: you can view the various versions you have installed.

nvm list


28 September 2023

Kubernetes Cluster Installation on RHEL 9

Kubernetes is an open-source container orchestration platform created to automate the deployment, scaling, administration, and orchestration of containerized applications. It is frequently shortened as K8s (K-8 characters between “K” and “s”). The Cloud Native Computing Foundation (CNCF) now maintains it after Google initially built it. Kubernetes is an effective platform for scalable, high-performance management of containerized applications. Here are some essential Kubernetes ideas and elements:

1 Container Orchestration: A platform for automating the deployment and maintenance of containerized applications is offered by Kubernetes. Containers are application-running environments that are compact, portable, and reliable. Based on resource usage and application needs, Kubernetes aids in ensuring that containers are deployed and scaled appropriately.

2 Kubectl: The command-line tool used to communicate with a Kubernetes cluster is called Kubectl. It enables users to build, examine, and control clusters and resources for Kubernetes.

3 Cluster Management: With a master node and numerous worker nodes, Kubernetes functions as a cluster. The cluster is managed and controlled by the master node, and containerized applications are run on the worker nodes. Due to its distributed architecture, high availability, and fault tolerance are guaranteed.

4 Containers: Applications are packaged and operated by Kubernetes in isolated, repeatable environments using container runtimes like Docker. Containers offer consistency between many settings, from production to development.

5 Pods: The Kubernetes term for the smallest deployable unit is “pod.” One or more containers in the same network and storage namespace can make up a pod. Co-located and co-scheduled on the same host, containers within a pod can easily communicate with one another.

6 Services: With Kubernetes, load balancing and the network are abstracted for applications utilizing services. Services give users a consistent virtual IP address and DNS name that may be used to direct traffic to a collection of pods. Because of this, apps can scale horizontally while preserving a constant network endpoint.

7 Replication Controllers and Replica Sets: These controllers guarantee that an agreed-upon number of pod replicas are active at all times. According to required replica counts, they are in charge of scaling up or down pods.

RHEL 9 had not yet been released as of my most recent knowledge update in September 2021, and depending on the version of RHEL you are running, the procedure for installing Kubernetes may differ. The most recent installation instructions are in the official RHEL 9 and Kubernetes documentation, which I strongly advise consulting. However, I can provide you with a rough breakdown of the procedures needed to install Kubernetes on RHEL:

Installing Kubernetes on RHEL Step By Step:

1 Docker (Container Runtime) installation:

Click ON The link to install the Docker:-

What Is Docker? How To Install RHEL 9

2 Disable the firewall and SELinux (optional):-
Since firewalls and SELinux might cause problems for Kubernetes, it’s frequently advised to turn them off. However, you need to set up SELinux and firewall rules for Kubernetes properly in a production environment. To momentarily turn off the firewall and SELinux:

( 1 ) Open the SELinux configuration file: /etc/selinux/config

[root@server ~]# vim /etc/selinux/config

( 2 ) Locate the following line:-

SELINUX=enforcing

( 3 ) Disabled should now be the value.

SELINUX=disabled

Close the file after saving your modifications.

( 4 ) SELinux is indefinitely disabled upon the subsequent reboot. Execute the following command to dynamically disable it prior to rebooting:

[root@server ~]# setenforce 0

3 Next Firewalld Disable and Stop 

[root@server ~]# systemctl stop firewalld.service
[root@server ~]# systemctl disable firewalld.service

3 Create a New Repository Kubernetes:- 

Installing Kubernetes components may be done using the official RHEL Kubernetes repository. Install Kubernetes after adding the repository:

tee /etc/yum.repos.d/kubernetes.repo <<EOF
[kubernetes]
name=Kubernetes
baseurl=https://packages.cloud.google.com/yum/repos/kubernetes-el7-\$basearch
enabled=1
gpgcheck=1
repo_gpgcheck=1
gpgkey=https://packages.cloud.google.com/yum/doc/yum-key.gpg
https://packages.cloud.google.com/yum/doc/rpm-package-key.gpg
EOF

4 The Kubernetes components are now ready for installation:-

[root@server ~]# yum install -y kubeadm kubelet kubectl

5 Start the Kubernetes services by enabling them:

[root@server ~]# systemctl start kubelet
[root@server ~]# systemctl enable kubelet


27 September 2023

How To Create Auto Scaling In [ AWS ]

It takes a few steps to set up auto-scaling in AWS, and it’s commonly used to dynamically change the number of Amazon EC2 instances in a group to match shifting workloads. Here is a step-by-step tutorial for setting up auto-scaling on AWS:

1 Logging into the AWS Console:
Using the login information for your AWS account, access the AWS Management Console.

How TO  CERATE (AMI)
How to take AMI of EC2 and launch new EC2 using AMI

2 Selecting or Building an Amazon Machine Image (AMI)
The configuration of the EC2 instances you want to launch might be represented by an existing AMI or by a custom one that you generate.

3 Create a Launch Configuration:
1 Go to the EC2 Dashboard.
2 Select “Launch Configurations” from the left navigation pane’s “Auto Scaling” section.
3 The “Create launch configuration” button should be clicked.


Launch template name
= highsky_template
Template version description = template_highsky

4 Choose the AMI that you want.

Click = My AMIs
And Click Amazon Machine Image (AMI) [ Image Name ] = auto_image

5 Set up the instance type, key pair, security groups, and, if necessary, any user data scripts.

Choose the instance type = t2.micro

Choose you’re  Key =   – – – – – – 

Choose you’re Network Settings 

6 After reviewing the settings, click “Create launch configuration.

                             Create launch template

4 Create an Auto Scaling Group:
1 Go to the EC2 Dashboard and select “Auto Scaling Groups” from the left navigation pane after creating the launch configuration.


2 Press the “Create an auto-scaling group” button.

Auto Scaling group name = Auto_scaling_group
Launch template = highsky_template
Click = Next

3 The launch configuration you made in the previous stage should be selected.

VPC = ( Default VPC )
Availability Zones and Subnets = [ yure Choose )w
And Click = Next 

4 Configure advanced options – optional: [ Choose a load balancer to distribute incoming traffic for your application across instances to make it more reliable and easily scalable. You can also set options that give you more control over health check replacements and monitoring.]

I’m Choose = No load balancer

5 Health checks [ Health checks increase availability by replacing unhealthy instances. When you use multiple health checks, all are evaluated, and if at least one fails, instance replacement occurs.]

  Health check grace period = 180 Minute
  And Click = Next

6 Set the group’s desired capacity, minimum, and maximum instance counts.

Desired capacity = 1
Minimum capacity = 1
Maximum capacity = 2
And Click = Next

6 Set Up Notifications (Optional):
Notifications can be set up to notify you of scaling events. Email, SMS, and other destinations can receive these updates via Amazon SNS (Simple Notification Service).

Click  =  Next 

7 Test Auto Scaling:
1 Manually start scaling events by simulating traffic or load spikes to make sure your system behaves as you anticipate.
2 Watch how the Auto Scaling group changes the number of instances it has based on the policies you’ve set..

Click = Next

8 Monitoring and upkeep: 
1 Keep a close eye on the performance of your Auto Scaling group and modify scaling rules as necessary to meet your application’s needs.
2 Your instances’ health should be monitored, and any sick instances should be replaced immediately..

And Click = Create Auto Scaling groups 

Check-in Instances

                            Successfully Create Auto Scaling 


Docker Certification in Ahmedabad
15 September 2023

Get Your Docker Certification Demystified For Container Mastery

Do you want to get your Docker certification to get an industry-recognised credential? To get recognition, you must pass the Docker Certified Associate (DCA) exam. It’s time to start with a specific course to improve your docker skills. Courses for Docker Certification in Ahmedabad are available at competitive prices; along with professionals guide the candidates. Let’s know more about the certification course.

What You Will Achieve with the Certification Course?

  • Digital certificate and Docker Certified Associate logo.
  • Recognition of Docker skills with official Docker credentials.
  • Accessthe Docker Certified professional network.

While preparing for your Docker certification exam, you have to cover major concepts related to Docker skills to become a proficient developer, application architect,and system administrator. Here are the concepts you will cover;

Running Containerised Applications

You will learn to run containerised appsfrom pre-existing images. This concept will help you to improve your programming and development skills by enabling you to spin up dev environments. There are centres for DevOps Online Training Ahmedabad where you can learn this concept.

Deploying Images in the Cluster

Another major concept where you can learnto achieve continuous delivery is by deploying images in the cluster in the form of containers.

Installation and Maintenance of Docker platform

This concept will provide you with a clear insight into the Docker platform. Here, you will learn to install and operate the platform. Moreover, you will also get an idea of its maintenance and upgrades. It will provide you with an insight into the internals of Docker.

Configuration and Troubleshooting

In this concept, you will learn to configure and troubleshoot the Docker engine. There are prominent Cloud Computing Certifications Ahmedabad that also offer Docker certification courses, where all these concepts are covered. When you dive deep into the core topics of configuration and troubleshooting, you will cover topics such as Orchestration, Installation and Configuration, Storage and Volumes, Image Creation, Management, and RegistrySecurity and Networking.

Other Concepts of Container Mastery

There are also other concepts to cover in your docker platform, such as understanding triage issue reports from the stakeholders and resolving them. Knowledge of new Docker environments and performing general maintenance. Also, you will learn to migrate traditional applications to containers. This concept will help to migrateyour existing apps as Docker containerised apps. You can consult Ansible Training Ahmedabad to learn about the Docker certification.

These are the major concepts covered in Docker certification courses. To know more about the course, DCA exam, and concepts, get in touch with HighSkyIT Solution.

Linux Certification Ahmedabad
19 July 2023

Continuing Education with Red Hat Staying Ahead in Open Source Technologies

In today’s rapidly evolving digital landscape, staying ahead in open-source technologies is essential for professionals seeking to excel in the field. With the vast popularity and significance of Linux administration and Red Hat technologies, it becomes crucial to equip oneself with the necessary skills and knowledge. If you are based in Ahmedabad, India, you’re in luck. A leading training provider offers top-notch Red Hat Training Course & Certification Ahmedabad designed to enhance your proficiency and open doors to exciting career opportunities.

Some features of Linux Administration with Online Classes in Ahmedabad

  • Comprehensive Curriculum:

This course provides a comprehensive curriculum that covers all aspects of managing and maintaining Linux-based systems. From basic concepts to advanced topics, you’ll gain a deep understanding of Linux architecture, command-line operations, user management, file systems, networking, security, and more. The curriculum is designed to equip you with the skills to handle real-world scenarios in Linux environments.

  • Flexibility and Convenience:

One of the primary advantages of online classes is the flexibility they offer. Whether you’re a working professional or a student, you can access the course materials and lectures at a time that suits you best. Companies like Highsky IT Solutions allow you to balance your learning with other commitments, making it convenient for individuals with busy schedules.

  • Interactive Learning Experience:

Engaging and interactive learning experiences are essential for effective comprehension and skill development. Through virtual labs, practical exercises, quizzes, and discussion forums, you’ll have hands-on opportunities to apply your knowledge, collaborate with peers, and seek guidance from experienced instructors.

  • Experienced Instructors:

To ensure a high-quality learning experience, Linux Administration Online Classes Ahmedabad are led by experienced instructors with extensive knowledge in the field. These instructors bring real-world expertise and industry insights to the virtual classroom, providing practical examples and guidance throughout the course.

  • Certification Opportunities:

Completing Linux Administration Online Classes may allow you to earn industry-recognized certifications. Choosing classes that align with recognized certification programs is essential to maximize the value of your learning journey.

Enhance Your Linux Expertise with RHCE, RHCSA, and Red Hat Training in Ahmedabad

In Ahmedabad, you can broaden your Linux administration skills through RHCE and RHCSA classes. These comprehensive programs offer a range of features to help you excel in Linux-based environments. RHCE RHCSA Classes in Ahmedabad provide in-depth knowledge and practical skills required to design, deploy, and manage Red Hat solutions effectively. Linux Training in Ahmedabad covers various topics such as system administration, network configuration, and security management. These institutions validate your expertise, enhancing your professional credibility. By enrolling in these programs, you can acquire valuable knowledge, hands-on experience, and potential career advancement opportunities in Linux administration.

Conclusion:

In a rapidly changing digital landscape, continuous education is vital for professionals seeking to stay ahead. Many offer a diverse range of online classes and training programs tailored to meet the demands of open-source technologies. By enrolling in Linux administration, Red Hat training, and certification courses, you can enhance your skill set and gain a competitive edge. Visit the highskyit.com website for more information and start your educational journey toward success.

05 July 2023

What Is OwnCloud & How To Install In Ubuntu 20.04

What Is OwnCloud?

Individuals and organizations can securely store, access, and share their files and documents using the self-hosted file synchronization and sharing platform known as OwnCloud. In contrast to cloud storage services like Dropbox, Google Drive, or OneDrive, it offers customers complete control over their data, serving as an alternative.

With OwnCloud, you may construct a private cloud storage solution on your own server or by using a hosting company. It offers capabilities like file synchronization between several devices, file sharing, group document editing, and data backup. The platform provides clients for many operating systems, such as Windows, macOS, Linux, Android, and iOS, enabling smooth file access from numerous devices.

One of OwnCloud’s main benefits is that you can store your data on your own servers or those of a reputable hosting company, guaranteeing that you will always have ownership and control over your files. Additionally, it offers options for encryption to increase security during file transfers and storage.

OwnCloud provides a number of extensions and plugins to enhance its functionality in addition to the essential file synchronization and sharing features. Task management, music streaming, calendar and contact synchronization, and interaction with other services like Microsoft Office Online or Collabora Online for group editing are a few of them.

Overall, OwnCloud offers a versatile and adaptable cloud storage option that enables people and organizations to manage their files, share information, and collaborate while still having complete control over their data.

How To Install OwnCloud In Ubuntu 20.04?

1 System Packages Update:-

Use the apt command below to update the system packages and repositories before you begin.

# apt update -y && apt upgrade -y

2 Install  Apache, MariaDB, And PHP Packages:-

How to install MariaDB and use MariaDB redhat

( 1 ) Apache:-  Apache Server is a free and open-source web server software that allows websites to be hosted on the Internet. An Apache server is a software program that is based on one computer and provides access to devices and websites on that computer to other computers on the Internet.

( 2 ) MariaDB:- Similar to MySQL, MariaDB is made to use tables, columns, and rows to store and manage structured data. It provides several programming interfaces and connectors for various computer languages, as well as SQL (Structured Query Language) for querying and modifying data.

( 3 ) PHP:- PHP is used to create OwnCloud, which is normally accessed through a web interface. To serve Owncloud files, as well as PHP  and other PHP modules required for OwnCloud to run efficiently, we will install the Apache webserver for this reason.

# apt install -y \
  apache2 libapache2-mod-php \
  mariadb-server openssl redis-server wget php-imagick \
  php-common php-curl php-gd php-gmp php-bcmath php-imap \
  php-intl php-json php-mbstring php-mysql php-ssh2 php-xml \
  php-zip php-apcu php-redis php-ldap php-phpseclib

3 By using the dpkg command after the installation is finished, you can check to see if Apache was installed:- 

# dpkg -l apache2

4 Run the commands to launch Apache and allow it to start automatically:-

( 1 ) Start:- Start Apache2 Service

# systemctl start apache2

( 2 ) Enable:- Use of this command  ” enable ”  automatically boot time. start Apache2 service

# systemctl enable apache2

( 3 ) Status:- Check service running

5 Check if PHP is installed. And version:-

# php -v

6 MariaDB Secure installation:-

MariaDB, just like MySQL is the default. secure Therefore, you must take another step and run the mysql_secure_installation script.

You are guided through a series of prompts by the Running command. You will need to create a root password first. The default root user unix socket authentication in MariaDB is insufficiently secure.

So, decline from using the Unix socket authentication by pressing  ” n ” and hitting

# mysql_secure_installation

NOTE: RUNNING ALL PARTS OF THIS SCRIPT IS RECOMMENDED FOR ALL MariaDB
SERVERS IN PRODUCTION USE! PLEASE READ EACH STEP CAREFULLY!

In order to log into MariaDB to secure it, we’ll need the current
password for the root user. If you’ve just installed MariaDB, and
you haven’t set the root password yet, the password will be blank,
so you should just press enter here.

Enter current password for root (enter for none): [Press Enter]

OK, successfully used password, moving on…

Setting the root password ensures that nobody can log into the MariaDB
root user without the proper authorisation.

Set root password? [Y/n]  [ Press Y ]

New password:                  [ redhat@123 ]
Re-enter new password:   [ redhat@123 ]
Password updated successfully!
Reloading privilege tables..
… Success!

By default, a MariaDB installation has an anonymous user, allowing anyone
to log into MariaDB without having to have a user account created for
them. This is intended only for testing, and to make the installation
go a bit smoother. You should remove them before moving into a
production environment.

Remove anonymous users? [Y/n] [ press Y ]

… Success!

Normally, root should only be allowed to connect from ‘localhost’. This
ensures that someone cannot guess at the root password from the network.

Disallow root login remotely? [Y/n] [ Press Y ]

… Success!

By default, MariaDB comes with a database named ‘test’ that anyone can
access. This is also intended only for testing, and should be removed
before moving into a production environment.

Remove test database and access to it? [Y/n] [ Press Y ]

– Dropping test database…
… Success!
– Removing privileges on test database…
… Success!

Reloading the privilege tables will ensure that all changes made so far
will take effect immediately.

Reload privilege tables now? [Y/n] [Press Y ]

… Success!

Cleaning up…

All done! If you’ve completed all of the above steps, your MariaDB
installation should now be secure.

Thanks for using MariaDB!

7 Create MariaDB Database:-

To store files both during and after installation, we must build a database for Owncloud. Therefore, log into MariaDB.

mysql -u root -p

Enter password: redhat@123

MariaDB [(none)]> CREATE DATABASE highsky_db;
MariaDB [(none)]> GRANT ALL ON highsky_db.* TO 'harry'@'localhost' IDENTIFIED BY 'redhat@123';
MariaDB [(none)]> FLUSH PRIVILEGES;
MariaDB [(none)]> EXIT

8 Download OwnCloud:-

wget https://download.owncloud.com/server/stable/owncloud-complete-latest.tar.bz2

9 Extract Directory:-

# tar -xjf owncloud-complete-latest.tar.bz2
# ls

10 Set Then permissions:-

# chown -R www-data:www-data owncloud
# chmod -R 755 owncloud

11 MV This Directory

mv owncloud /var/www/

12 Apache Configure for OwnCloud:-

We will set up Apache to serve OwnCloud’s files at this stage. To accomplish that, we will make the aforementioned Owncloud setup file.

# vim /etc/apache2/conf-available/owncloud.conf
Alias /owncloud "/var/www/owncloud/"

<Directory /var/www/owncloud/>
  Options +FollowSymlinks
  AllowOverride All

 <IfModule mod_dav.c>
  Dav off
 </IfModule>

 SetEnv HOME /var/www/owncloud
 SetEnv HTTP_HOME /var/www/owncloud

</Directory>

Save and close the file.

13 The next step is to run the commands listed below to activate all the necessary Apache modules and the newly added configuration:

# a2enconf owncloud

# a2enmod rewrite

# a2enmod headers

# a2enmod env

# a2enmod dir

# a2enmod mime

14 Restarting the Apache web server will make the modifications effective:-

systemctl restart apache2

15 Completing The Installation Of OwnCloud

The only step left to do is to install OwnCloud on a browser once all relevant configurations have been completed. Therefore, open your browser and enter the address of your server, followed by the

Username = admin
Password = admin

Database User = harry
Database Password = redhat@123
Database name = highsky_db

Username = admin

Password = admin

Successfully Install


29 June 2023

What Is Docker? How To Install RHEL 9

What Is Docker?

With the aid of containerization, you can deploy, scale, and manage apps automatically using the open-source platform Docker. To run an application reliably across various computer environments, containers are compact, isolated environments that package an application and its dependencies.

The following are some fundamental Dock ideas.

Images: To launch a containerized application, a basic operating system, application code, and dependencies must be defined in read-only templates called “docker images.” Images can be created from scratch or based on pre-existing images found in open or closed Docker registries.

Containers: Instances of Docker images are containers. They are easy to create, start, stop, move, and remove, and they are lightweight. Because each container is independent and has its filesystem, processes, and networking, they are reproducible and transferable between various settings.

Docker Compose: You may define and manage multi-container applications using Docker Compose. It makes it simple to create and run complicated, interconnected systems by using a YAML file to define the services, networks, and volumes needed by your application.

Dockerfile: You may define and manage multi-container applications using Docker Compose. It makes it simple to create and run complicated, interconnected systems by using a YAML file to define the services, networks, and volumes needed by your application.

Containerization: A container is created by Docker by encapsulating an application along with all of its dependencies, including libraries, frameworks, and tools. Consistency and mobility are ensured by the isolation of containers from one another and the underlying host system.

Docker Registry: A repository for Docker images is known as a Docker registry. The default public registry where you may get a variety of pre-built images is the Docker Hub. Additionally, private registries can be created so that you can share and keep your photographs within your company.

With Docker, applications can be packaged and distributed in a flexible and effective manner, resulting in shorter development cycles, increased scalability, and more effective resource use. Due to its simplicity of use, portability, and ecosystem of tools and services, it has grown to be a well-liked technology in the field of software development and deployment.

How To Install Docker :-
What is Docker? And How To Install In Ubuntu 20.04

Red Hat 9 is a fairly old version of Red Hat Linux, as was previously indicated, and Docker is incompatible with it. A contemporary operating system with a compatible kernel version is necessary for Docker.

Remove Old versions

The names of earlier versions of Docker were docker or docker-engine. Before attempting to install a new version and any associated dependencies, uninstall any such previous versions. Additionally, if Podman has already been installed, remove it and the related dependencies:

yum remove docker \
docker-client \
docker-client-latest \
docker-common \
docker-latest \
docker-latest-logrotate \
docker-logrotate \
docker-engine \
podman \
runc

All Posts

press y 

Complete ! Remove 

Installation methods Docker :-

Set up the repository and install the yum-utils package, which includes the yum-config-manager tool.

yum install -y yum-utils

yum-config-manager --add-repo https://download.docker.com/linux/centos/docker-ce.repo

Install Docker Engine

Installing container, the docker engine, and docker compose

yum install docker-ce docker-ce-cli containerd.io docker-buildx-plugin docker-compose-plugin -y

Start Docker.

systemctl start docker

of this command  ” enable”  automatically boot time. start  Docker service

systemctl enable docker

Check service running

systemctl status docker.service

28 June 2023

What is Docker? And How To Install In Ubuntu 20.04

Containers are standardized, executable components that integrate application source code with the operating system (OS) libraries and dependencies necessary to run that code in any environment. Docker is an open-source platform that empowers developers to build, distribute, operate, update, and manage containers.

The magic bullet that permanently fixed the virtualization and software container issues was Docker. Yes, that is a bold statement! Other products had made an effort to address these issues, but Docker’s novel strategy and ecosystem had completely eliminated the competition. You will learn the fundamentals of Docker in this course so that you can start utilizing it for your own applications and incorporating it into your workflow.

 1  Installing Docker

What Is Docker? How To Install Rehal 9

It’s possible that the Docker installation package included in the official Ubuntu repository is out of date. We’ll install Docker from the official Docker repository to make sure we have the most up-to-date version. To accomplish that, we will first create a new package source, then install the package after adding the GPG key from Docker to confirm the downloads are legitimate.

Update your current list of packages first:.

apt update

Install the following prerequisites to enable apt to use packages through HTTPS:

apt install apt-transport-https ca-certificates curl software-properties-common

curl -fsSL https://download.docker.com/linux/ubuntu/gpg | sudo apt-key add -

Then add your system’s GPG key for the official Docker repository:

APT sources should include the Docker repository:

add-apt-repository "deb [arch=amd64] https://download.docker.com/linux/ubuntu focal stable"

Additionally, this will add the Docker packages from the recently added repository to our package database.

Verify that you are about to install from the Docker repository rather than the standard Ubuntu repository:

The result will look like this, albeit Docker’s version number can be different:

Note that docker-cue is not installed, but Ubuntu 20.04 (focal)’s Docker repository is the installation candidate.

Install Docker lastly:

apt install docker-ce

Now that Docker has been set up, the daemon should be running and the process should be set to launch upon boot. Verify that it is operating:

To verify that the service is operational and operating, the output should resemble the following:

The Docker client as well as the Docker service (daemon) are now included with the installation of Docker. Later in this lesson, we’ll look at how to use the docker command.

Install docker in complete 

WhatsApp chat